Tuesday, 13 March 2012

Terra


 Just a short informative post this time!
Another Cloopco design - "Terra" neck-warmer - has been added to the Ravelry patterns data base.
“Terra” is a cabled, seamless, buttony neck-warmer that can be worn either buttoned or completely or partially unbuttoned.
Rich in texture, it is also a very simple knit. The constant intertwining of cables that cover the majority of the neck-warmer represents a great cure against boredom during knitting. At the same time, the simplicity of the main pattern, repeated four times in each row, makes this a great knit even for knitters with no experience in cable knitting.


The pattern has been thoroughly tested by six amazing Ravelers (thank you!) and is now offered as a free Ravelry download.
You can see one of the test knits lilibethsgarden's blog. It's beautful!
The download link and more information about the pattern can be found  HERE.

Happy knitting!


Wednesday, 22 February 2012

Eastern Uncrossed knitting: yarn tension and styles


Let's move on with Eastern Uncrossed knitting.
I decided to dedicate one whole post to yarn tension in Eastern knitting but, before I say anything about the ways of tensioning yarn, I would like to say a few words about knitting styles and try to make a distinction between two terms that are often confused: knitting styles and knitting methods.

1) Eastern Uncrossed knitting (introduced in my first post), like Western Uncrossed and Combination or Combined knitting  (sometimes also called "Russian knitting") is a stand alone knitting method and, by all means-  it is a METHOD.
By "method" we mean  a set of rules that need to be respected since in each of the above mentioned methods, fabric is created in a specific manner.
It is very important to stress, though, that all knitting methods create the same type of fabric. Still, depending on the method we use, we approach knitting differently. In their book "Knitting in the Old Way" (great book!), Priscilla Gibson-Roberts and Deborah Robson actually refer to methods as "the approaches to knitting" and I quite like that term.
There are three main factors that determine a knitting method:  
  • stitch mount (or the orientation of the stitch),
  • the way we approach the stitch with our working needle and  
  • the direction in which the yarn is wrapped around the needle,
all three connected and mutually dependant. (We mount the stitches in a specific way , we knit them respecting their orientation and, finally, we wrap the yarn in a specific direction to achieve the original stitch mount again. It's a circle!).

 The difference between knitting methods is the most important difference in knitting as patterns written for one method often need to be adjusted for another one. Otherwise, they won't "work".
 In addition (and although switching between methods is very easy and can be done any time during knitting) it is not possible to switch to working in another method without re-setting or re-mounting the stitches (i.e. you cannot take a piece started by a Western  knitter and simply continue knitting the Eastern way- you would end up making twisted stitches).

Everything else- the way you hold or tension your working yarn, the hand in which you hold it etc. - is a matter of style and entirely optional.


2) Besides the names underlined in the first paragraph, we often see terms like: Continental, English, Portuguese/Bosnian etc. These are just STYLES and can be applied to absolutely any knitting method.
Knitting styles are determined by various factors like the distribution of knitting tools/materials in our hands, the technique of tensioning yarn or  motions we use to create stitches. As you can imagine, there are many variations: you can hold the yarn in your left hand or in your right hand. You can hold the yarn in your left hand and wrap it around the needle with that same hand or you can pick it up with your right-hand needle. And so on. 
But, one thing is sure - the way that the yarn is tensioned is the crucial element of each knitting style.

It is important to say that
  •  knitting styles do not affect the appearance or the structure of the fabric,
  •  knitting styles do not interfere with knitting methods
  •  all method/style combinations are possible
 In my first post about Eastern knitting you can find a great example of different styles inside the same knitting method-  purl stitch is particularly interesting. 
Before making purling, we can hold the yarn either in the back or in the front of the work. At first glance, this (apparently) huge difference may give the impression of two completely different knitting methods.
But, regardless of whether we bring the yarn to the front at the very beginning or immediately before purling,  in styles, it will eventually be brought in front of the working needle (maybe not in front of work but in front of the needle definitely).
 Briefly, we can do it this way or the other but, as long as the stitch mount, the side of the stitch into which we knit and the direction of yarn are not disturbed- we are talking about one knitting method.

  So, as you can see, although a style is the most 'visible' element of knitting, the differences between styles are minor and neglectable in terms of achieving the desired result.

And, now, having said all this, I still have to conclude that this classification often causes a lot of confusion. Which is not all that strange, after all, knitting is not quantum physics! We invent different terms for better understanding but we also get all tangled up in them on regular basis. That is why it is always better to knit than to talk! :)
The main cause of confusion is hiding in the fact that methods and styles are occasionally confused and you will often hear people saying that they "knit Continental ". This isn't generally a huge problem but it can be annoying for knitters who need to adjust patterns for their own method. Continental is a style, not a method, and it doesn't answer their main question- Can I knit this without changing the pattern?
 
So, when you find a pattern you want to knit- make sure you know what method it is intended for (it is especially important in lace knitting! Cables, for instance, often need no interventions. Or almost none! ).
 If the info says that the pattern is written for Continental or English knitters - ask again! :) All the chances are that it is actually a pattern for Western knitters but- ask again!

All the names (both for methods and styles) that we now commonly use are imported from English speaking, Western countries and, since Western (uncrossed) knitting is the predominant (or "default") method in most West European and New World countries, as frustrating as it can be for knitters who practise other methods, it is expected that some differences will, occasionally, be neglected and that styles and methods will, every now and then, be thrown into the same basket.

So, can we simply call styles in different methods differently too? We could- if we had the names for them. Be we haven't got any!  :)  Don't ask why- I don't know! But, I could think of at least a zillion potential reasons for that. Namely, unlike in the New World  where a single language is spoken across the whole continent, in Europe, there are sometimes more than 10 languages in a region smaller than a single US state. :) Different cultures do not communicate as easily and intensely as a single one and, obviously, finding a universally acceptable name for a style in (an almost marginal) hobby is usually a mission impossible.
 A few names that have popped out in the past and become "accepted" are mainly just adjectives derived from the names of regions in which a certain style is mainly practised. But, even in these cases, the names are generally  recognised only by knitters who live outside that region or country :).
Portuguese people will probably simply tell you that they - knit. It is us from other countries who say that that their style Portuguese.


So, for now, we're 'stuck' with the globally accepted, English names and terms.
Is it OK, then, to say that you're an Eastern uncrossed Continental style knitter? 
If it describes your knitting style and helps you explain it to another knitter better then it is, by all means OK! :)


Now, having demystified this, let's move onto the practical part!


Bosnian or Balkan (aka Portuguese) style knitting

This style is commonly called Portuguese knitting by Western knitters but it also exists on the Balkan peninsula and is, under the name Bosnian knitting, even sometimes mentioned in western literature. 
Since it is the only style with a proper name among Eastern knitters that I can think of (and usually associated with Eastern method knitters), I will call it Bosnian.
There are no real differences between the two styles except, maybe, one- Bosnian style knitters do not use pins or holders that you can often see in Portuguese knitting.

The specific thing about this knitting style is that the yarn is tensioned around the neck  (which is a great source of inspiration for dark humour jokes among husbands and mother-in-laws of women who practise this style :D ).
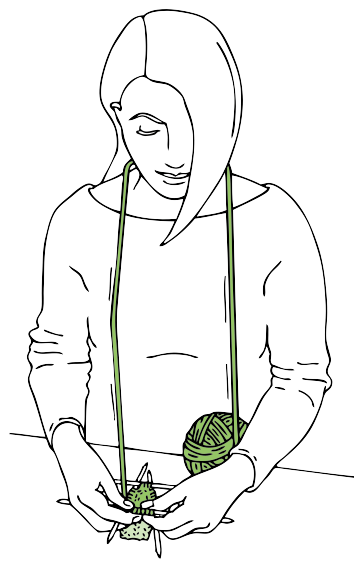
Luckily, Donna Druchunas, who's article about Bosnian knitting style was published this autumn in Knitty magazine (the link will take you to the article), has saved me from having to undertake the dangerous mission of wrapping my self in yarn and posing for photos to show you what this style actually looks like (and my friend Sunny from having to witness all that- she is a volunteering photographer, after all, not a National Geographic corespondent.) 

So, as you can see in the picture, the  yarn is simply hanged over the neck and controlled with fingers in front of the work.


This is what it looks like from knitter's perspective!

This photo looks scary- I like it!


The yarn is controlled with fingers
Now, if you try this  you will soon see that making a knit stitch (when the yarn needs to be in the back) is a very hard task. But, there's a cure! In different parts of the Balkan peninsula where this style is widely accepted,  knitters have come up with a solution to this problem - traditionally, they would always purl! Garter stitch? No! Real stocking stitch or stockinette with knits on the RS and purls on the WS of the work. 
Sounds crazy? The system is actually quite simple- whenever possible, knitting is done in circle and the knitter is always facing the inner side of the tube (or the WS side). Sleeves, hats, mittens, sweaters, socks...all tubes! Easy! Well, most of the time, anyway. I don't know if it has anything to do with how the purl stitch is made in Eastern uncrossed but, personally, I prefer purling over knitting as well and often make sleeves that way too. I also purl all garter rows.
But, what remains a mystery is- how an intarsia pattern can be knit from the wrong side of the work?! 
It has to be possible, of course- complicated stranded colourwork  is actually the most recognisable type of project in the region where this style has been practiced for centuries (socks from the article are a great example).
But,  it is quite amazing! Nordic knitters have invented  steeks to avoid purling with multiple colours. At the same time, deep in the south of the same continent, colourful socks are purled from the beginning to the end.


Yarn tensioned over the index finger (aka Continental style)

I believe that this style doesn't really require much explanations - it is probably the most common style among knitters of all methods.

Continental Eastern Uncrossed knitting


In Continental style, the yarn is tensioned over the index finger and usually simply "scooped" with the right-hand (working) needle which allows the left hand to rest on the other needle most of the time.


On the RS, the system is pretty much the same as in Western knitting only the needle is inserted into the stitch from a different angle and the yarn is wrapped in the opposite direction.

Eastern Uncrossed Continental knit stitch- yarn wrapped clockwise


You can see this style in motion HERE

When it comes to purling, there are two main sub-styles.
The first version is, again, almost the same as in Western Continental.
The yarn is brought to the front and is then picked up with the working needle and pulled through the old stitch.

Eastern Uncrossed Continental purl stitch 1

 You can see this style in motion (both knits and purls) in THIS video. (Disregard the title- it says Combination but what is shown in it is really 100% Eastern Uncrossed knitting).

The second way of making a purl stitch in this style often looks quite odd to knitters who are used to the standard Continental purling but is, actually, the very same thing only achieved in a slightly different manner.

In this version, the yarn is always held  in the back of the work.

Before purling, the yarn is in a "sandwich" between the needles; behind the left-hand needle and in front of the working needle.
The needle is inserted into the stitch from the back (and under the yarn).


With a tiny motion of the right hand, the stitch is 'opened' (the 3rd photo above) and the yarn is brought in front of the needle, scooped and pulled through the old stitch (shown bellow).


Again, this stitch is exactly the same as all other Eastern uncrossed purl stitches- the yarn may be in the back but, right before purling, it is brought in front of the needle and wrapped around it in the proper direction. The stitch mount also remains intact.
Here's a VIDEO.

Yarn wrapped around the index finger

I think that the majority of knitters who use this style on regular basis were originally crocheters as this is the most common way of tensioning yarn in crochet.
The yarn tensioned this way is somewhat inflexible and requires constant adjustment and finger movement.


Just like in the previous (Continental) style, the working yarn is usually simply scooped with the right hand needle and pulled through the old stitch.
The system is not much different on the WS either and both versions of the purl stitch mentioned under Continental style an be applied to this style as well.


Left-carry Throwers, "Yarn in a basket",  Tension Without Tension, The Old School Style...

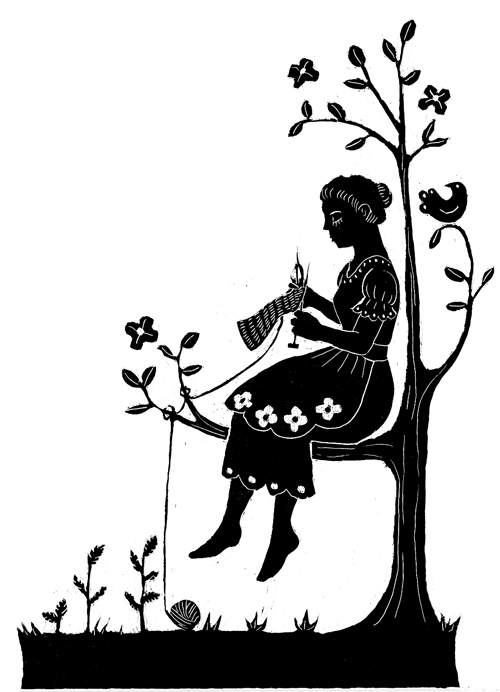
 I'm sure that all of you have seen at least one picture like this one so far. Of course, knitters don't usually sit on a tree branch :) (I only picked this graphic because I really liked it :D ) but the ball is almost always on the ground and, many times, in a basket. The purpose of a basket is quite obvious; it prevents the ball from rolling away and catching dirt. But, why is the ball on the ground?
 
In many books about the history of  knitting I have read that, traditionally, one of the most important factors in knitting is- gravity! A ball placed on the ground can "feel" the knitter's need for more yarn. In addition, its position allows the gravity to take active part in knitting and to unwind the ball when necessary, releasing some extra yarn for the knitter. 
In my opinion, this style just might have a lot to do with the story about the knitter called Gravity.


But, in order for this principle to work, there should be no blockages between the ball and the knitter's hands- the yarn should be allowed to move freely.  In reality, this is done by holding yarn between index and middle finger of our left hand.
Since, in this style, the yarn is too loose to be picked up with working needle, when making a new stitch, we need to wrap it around the needle using the tips of the thumb and the adjacent finger (index or middle finger) which makes this style a rare example of knitting in which both hands are equally engaged.

Wrapping  yarn around the needle on RS

Wrapping yarn around the needle on WS

I have mentioned quite a few names in the title of this section but but I have to say that they are all provisional. The truth is- western terminology still hasn't come up with a good name for this style which makes me very proud as this is my style. (I like being a UKO -Unidentified Knitting Object).
Using "English throwing" as an analogy, we could say that knitters who practice this style are simply Left-carry Throwers.
Videos of this style in motion can be seen in my first post about Eastern Uncrossed knitting.


Right-carry throwers (aka English style) 

Given that English style is quite popular among Western knitters, I thought it deserved to be mentioned here but I have to say that I don't recall ever seeing an Eastern Uncrossed English style knitter. It appears that knitting with yarn in the right hand, just like knitting backwards, is mainly reserved for left-handed knitters.
That, of course, is not to say that Eastern Uncrossed knitting denies this style as it neither encourages or discourages knitters to hold their yarn in a specific manner but, generally speaking, English style or right-carry throwing is definitely not as popular in the East as it is in the West.


That's it!
In my next post about Eastern Uncrossed knitting I'll be talking about yarn overs and twisted stitches. Stay tuned!
 

Wednesday, 25 January 2012

Moments of lace (Moments in red)


Another of Shui Kuen Kozinski amazing designs - the Moonlight Sonata shawl with picot edging. Breathtakingly beautiful as always.
Made in less than 3 days.


Pattern: Moonlight Sonata 2  by SK Kozinski (another variation of the pattern - Moonlight Sonata shawl) - both patterns are available for free, i don't know what you're waiting for :)

Materials used:


Yarn: 3 skeins of Unitas Hana, 100% ecco cotton, 4ply (fingering)
Colourway: red lipstick
Metereage/yardage: 373m (408 yards)
Needles: 4mm (US 6)
Size: shawlette (finished measurements: 161cm x 65cm / 63.4" x 25.6" relaxed after blocking)
Blocking: iron blocked


It was a very windy day
Yes, the sea is a bit tilted, I don't know what happened to it, it used to be normal


Friday, 20 January 2012

Eastern uncrossed knitting: knits and purls

I am an Eastern style knitter.
To be even more precise, my knitting style is called the Eastern uncrossed knitting method. In knitting literature it is usually called simply Eastern knitting and commonly labeled- the oldest knitting method.

Where I live, many knitters practice this style but, knitters from other parts of the world either don't know anything about it or have a very vague idea of what it is.
There aren't many informations about it on the internet and, over the past couple of years, I have been asked to write about it  more than once. I have also promised to do so more than once.
The reason for constant postponing was - what looked like a simple project at first, turned out to be not so simple :) as it included collecting and processing a lot more material than I'd expected.
But, now, having collected most of it, I have no excuse to put it off any more.
I owe one huge "Thank you" to my friend Sunny for her extraterrestrial patience, her help and for being my photographer.

For the sake of simplicity and better organisation, I will  divide the material into a few posts. I still don't know exactly what will go where but, some of the things about Eastern uncrossed knitting that I will surely talk about (sooner or later) are: basics (knit and purl stitches), stitch mount, yarn overs, yarn tension, twisted stitches,  decreases, differences between eastern and western knitting, "translating" patterns, switching between the styles and more.

The first part covers the stitch mount, knit and purl stitches.
Let's begin!

(you can enlarge any picture by clicking on it)

EASTERN UNCROSSED KNITTING

Stitch mount

The stitches have two legs, right?! And one bottom! (well, they do!). For this reason, the stitches can sit on the needles in more than one way. The way they are positioned (or mounted) on our needles is technically one of the most important things in knitting as it determines the knitting style and dictates the whole process of knitting.
So, the orientation of the stitches on the needles is what we call the stitch mount.

Eastern uncrossed stitch mount


In  Eastern uncrossed knitting, the leading leg of the stitch is always behind the needle. Most knitters will simply tell you that the "right leg is in the back" but I find this explanation somewhat confusing (it gets even worse if you're one of those people who can never tell right from left). The leading leg works much better for me.
In the above picture you can see what it looks like in reality.
It is important to say that the stitches are always mounted this way in Eastern uncrossed (which is what makes it uncrossed); they're the same on the right side as well as on the wrong side, in circular knitting (in-the-round) as well as in flat knitting (back-and-forth).
Therefore, the stitches are always knit (and purled) the same way, too.
And this is how!

Knit stitch


With the yarn in the back of the work, we insert the working needle (right-hand needle) into the back of the stitch (as shown above)


The yarn is wrapped around the needle overhand or, as we usually say, clockwise. The former is probably more precise and less confusing.

When the yarn is wrapped around the needle, we simply pull it through the old stitch...


...and, it's a new knit stitch.

Here's a short video showing how it is done!


Depending on how the yarn is held, the process of making a knit stitch may vary.
I keep the yarn between my fingers and literally wrap it around the needle. Knitters who tension their yarn over the index finger, usually pick it up with the working needle (instead of wrapping it around the needle).
I will get back to the yarn tension in one of my future posts but, until then, you might want to see THIS VIDEO as it explains how a knit stitch is made by picking up the yarn tensioned over the finger.

Let's move on!

Purl stitch


Before making a purl stitch, the yarn should be in the front.


We purl into the back of the stitch, meaning that the we bring the tip of the working needle to the back leg of the stitch and insert it into it from behind .


Then we wrap the yarn around the needle underhand or clockwise a shown above.

We pull the yarn through...


...and it's a new purl stitch.

Here's another short video!


Again, knitters who tension their yarn differently, purl differently too! HERE you can see a video showing another very common method. At first sight it looks quite different but, if you give it a closer look, you'll notice that it is actually the very same thing only achieved in a slightly different manner. In this style the yarn stays in the back all the time.

That's it for now!
In the next post I will talk about styles and yarn tension in Eastern Uncrossed knitting.

Tuesday, 3 January 2012

My wreaths


First of all, I wish you all a very happy New Year! I hope you had a lovely time this Saturday. I also hope that you are sober by now!

Secondly- it is snowing on my blog! I hope you can see it! (If you can see the tiny little dots falling down from the header, then you're sober. If you always see tiny little dots falling down from the header, than you're never sober because I added this gadget yesterday! If you're reading this three years from now and think that it is still snowing, you have not been sober in years, my friend! Cheers!)

Ok, now, back to work! My first post in 2012.
In addition to my last post, I have two more wreaths to show you.
After seeing so many lovely hand-made yarn wreaths on the internet a fortnight ago, I got completely confused and was pretty sure that I would need at least a year to come up with a unique idea for my own wreath. But, as it turns out- I was wrong; making yarn wreaths is extremely addictive and, by the next evening, I had already made two. And I like them both. Now I need two New Years!

I took some pictures as I "wrapped" along. If you have no better things to do, stay here and look around.
And, please excuse the poor quality of some of the photos- the days are quite short and I did the majority of work later in the afternoon (I hated the idea of getting up at 7AM just to beg the Sun to assist me).

Here's how it went.

Although I originally intended to use styrofoam rings as the base, I eventually replaced them with simple straw wreaths; stryofoam is very fragile and I am awfully clumsy (read: I broke two wreaths at the very beginning).


MATERIALS AND TOOLS USED: 2 straw wreaths ( 20cm / 7in and 17.5cm / 8in in diameter), adhesive tape, leftover yarns (mainly 8ply) in 3 colours (pine green, deep red and white), some plied metallic yarn in golden colour, transparent glue, a crochet hook, scissors.
ADDITIONAL DECORATIONS: tiny cones (picked here and there), a few ornaments from my old wreath (something old), a few ornaments bought especially for my new wreaths (something new).


Since the wreaths I bought did not  come in plastic wrapping as they often do,  I first had to cover them with adhesive tape to get a smooth and even surface (Picture 1).
I decided to use the white yarns for my first, smaller, wreath. I found a tiny ball of a lovely, puffy yarn in snow white but I soon realised that I would not have enough to cover the whole wreath. But, there was just about enough yarn in the ball to give a lovely, snowy, final touch to the wreath. So; first I wrapped the wreath with another white yarn (just a stupid, ugly, 100% acrylic yarn), adding a few drops of glue as I worked along. The first layer created a solid, white base (Picture 2). Then, I sparsely wrapped the wreath with the second white yarn (I hope you can see the difference on the Picture 3).
Finally, the base was finished and it looked very puffy and fluffy. Just what I wanted!

The only thing left to do was to add the decorations.

When I started planning these projects, I promised myself that I would not spend money on shiny, glittery and sparkly ornaments no matter how appealing they are; I wanted my wreaths to be as hand-made as possible. Besides, I wanted to use some of the ornaments from the old wreath. But when I spotted the balls from the picture on the left, I just couldn't resist buying them. The special thing about this type of ornaments is that each ball is attached to a long piece of shiny wire on the back which makes attaching them to a wreath extremely easy. No glue required. I'll show you in a minute.


You simply untwist the wire, pick the ornaments you wan to use, and wrap the wire around the wreath (Picture 5). Then you twist the wire tails on the back to fasten the ornaments (Picture 6). That's it! Beautiful!
I also added a few decorations from the old wreath and and glued two tiny cones to the yarn. The result is shown in the Picture 7.
But I didn't like it. And, so I took some red yarn and turned my wreath into a sugar cane.


 I did pretty much the same thing with the second wreath.   

First the adhesive tape, then some glue and then the yarn. Pine green in this case.Once I finished applying the first layer of yarn, I added a spiral stripe of metallic yarn all around the wreath. Two layers actually!
Then I pimped it with some ornaments and the second wreath was done!


Monday, 19 December 2011

Sorry, is that yarn in your wreath?

Every year, three weeks before New Year's eve, my family, like many others,  hangs a nice, decorative wreath on the front door.
 When I was a kid, I invented a ritual - back then we lived on the 8th floor of a high building and, on the day when the wreaths are traditionally hanged for children to admire and for the neighbours to envy , I never used the lift. Instead, I would walk all the way up to the last floor carefully examining every wreath in the building. (OK, I admit, I would  also usually spit my chewing gum from the balcony on the last floor just to test the law of gravity!)
Then, a few days later, I would repeat the ritual and would usually notice that a few wreaths had been replaced in the mean time. Each time my friend and his mother who lived on the 3rd floor put a lovely, shiny ring on their door, their first neighbour would buy herself a new, shinier one! It was a real war!

I haven't abandoned my little ritual to this day and, although my family now lives on the 6th floor of a much smaller building,  the route to the top still turns into a decent gallery in December.
I finished my first inspection of the wreaths 2 days ago. :) This year 3 wreaths between the 3rd and the 5th floor are sea-themed; sea shells, sea stars and pebbles. That's new and original! (But, let's face it- it has to be a conspiracy! I suspect that there's a secret wreath-society downstairs that does not accept members from  the upper floors!  Bummer!)
Apart from the freemason's sea-themed wreaths, most others are pretty traditionally decorated; Christmas stars, bells, ribbons and ornaments, 1 Mickey Mouse and 2 Ninja turtles.
Some are made of fresh pine branches, others only have a few ugly plastic flowers on them. Some are new, some are old, and some are simply not up to this competition any more. I believe that one of them is actually ours. :) It is still lovely, the willow ring is still firm and glossy only the tiny decorations and fake Christmas stars are not in the best of all shapes any more. The wreath fell off more than once and some of the decorations had to be replaced, others are damaged and a few beg to be replaced (with Ninja turtles) as soon as possible.

So, I decided that our door needed a new wreath. A hand made one. Yesterday I went to a supermarket where they sell plain, styrofoam rings and bought one ring and a few styrofoam balls. Then I sat down in front of my computer and Googled! And Googled! And Googled! And I realised that there are THOUSANDS of amazing wreaths made with yarn, knit, crocheted and felted out there. I'm not sure I will actually have this wreath finished before 2012. - all the inspiration models are so lovely that I just can't make up mind. I think I will actually have  to take a year to think and decide which one to make. :)
So, before I can hang my own yarn wreath on my blog, I'll share some of the loveliest examples from the internet with you!
They are not all necessarily Christmas wreaths but that doesn't even matter! They're all gorgeous!


Yarn balls, felted flowers, garter ribbons, knitting needles, pom-poms, knit fabric, crocheted lace, argyle, stripes...you name it!

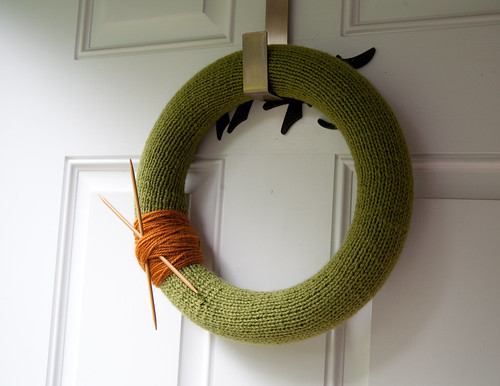
And, my personal favourite:


:)))) Obviously!

The following links will take you to a few lovely tutorials. In some of them you will find the instructions for making a few of the wreaths posted above.

Enjoy and happy crafting!


Monday, 12 December 2011

Blog makeover

No knitting this time. Just a brief announcement!

Obviously, if you are reading this then you have already noticed that Cloopco has been completely redesigned. I hope you like the new version!  I do! :) I think this is just the kind of blog I have always wanted to have. I don't know what I was thinking when I picked that dark background for the first version.

Also, besides the most obvious (header and colours), the blog is now using a different and somewhat narrower template which, initially, shrunk the main panel a little. I did my best to adjust the margins but, the change  affected a few posts originally published on the old version which is why they are now a wee bit scrambled. Nothing serious 'tho.
So, after brief inspection, my main impression is that, all in all,  this whole make-over process has left far less mess than I'd expected.

Again, I hope you like it!

Until very soon,

Cheers,

Maja!

Monday, 5 December 2011

Knit me a song

"Leben" - by Heidrun Liegmann-Halama
In February 2000., I was invited to a graduation party thrown by a friend who had just returned from abroad with a diploma from one of  Europe's oldest Conservatoriums of Music. At the time, I was still a student of dramatic and performing arts.
I went to the party with my friend, now a painter and, back then, still a student of painting at the Academy of Fine Arts. It was a lovely party. And it lasted for almost 24h. :)

Some time during the night and after a few bottles of great wine, our host, the freshly graduated professional musician, started singing a traditional song from his father's home region, followed only by the delicate sounds of guitar, played by his close friend. I think that the guitar player was not even familiar with the original melody but they made a great duo. I have never learnt whether the song my friend sang that night was in some foreign language or in a complicated regional dialect but not one person in the room could recognise a single word of it. And, yet, my friend's voice magically translated it for us and, as silly as it may sound, we understood everything. It was a spectacular moment. His voice, his performance...we were mesmerised.
When the song finished, the room was filled with dense silence and we all remained frozen for almost 10 minutes until my friend, the painter, suddenly  broke the silence and said: "HEAVENS!  I WANT TO BE ABLE TO PAINT THIS SONG!  "


Back in those days, we were curious and confused as only 20 year old people can be. At the same time, we thought we knew everything and were too proud to admit that there was still much more to be learnt. Our education was finely intertwined with our personal growth and, sometimes, our intimate questions would collide with our professional curiosity and we'd find ourselves swimming upstream all tangled up in life and with the education sitting on our shoulders. We would usually continue fighting the stream for days until a single word or picture woke us up and made everything seem clear again.
Our professor, well aware of all the rapids and traps set for us on the path of our education, would often rescue us from our own youthful arrogance by saying: " Studying to become an artist does not mean that you will eventually become one.  Every art, in its essence, is just a craft. And every craft can become Art! When you leave this school, you will all be craftsmen.  But, not necessarily artists.  Still, don't be discouraged by this - it is actually a very good thing. It allows every carpenter and every chef to become an artist. Of course, it also allows lazy actors and musician to turn theatres and operas into pointless country fairs. Now, whether you will take your craft that one step forward  depends only on you."

Throughout the years, my professor's words have helped me to never forget that the muses can easily slip out of our hands if we're not careful enough but also that beauty and the magic of art can be found absolutely everywhere. My friend's words, on the other hand, have been a constant reminder of how that magic can be created; to be an artist, you need to always 'want to paint a song'. It's as easy as that!
Whenever you see someone trying to do that, you'll know you're very near the magic.

But, although I am not any more surprised by the fact that the purest form of art can be found anywhere, from kitchens and tiny shops to school playgrounds, honestly speaking,  I am still very excited when I unexpectedly find it.
A fortnight ago, while I was collecting material for my previous post, the path of a craft intersected with that of the art in front of my eyes again and caught me unprepared- I came across craftsmen who took their craft that one step forward.
I have found the artists who knit and crochet songs. :)

Quite amazing!
Here are some of their works!

The "Knitters Dreamtime" wall-hanging made by Jane Thornley

This first wall hanging evolved, as the authors says, "from her lifelong fascination and desire to learn from aboriginal and indigenous peoples the world over."
The central motif is a human hand, "a reoccurring motif in many prehistoric pictographs and rock art in Australia and the world over".


I had already written the introduction to this post when I opened Jane's page again to collect the link to the project picture and noticed that her explanations quite resonated with my friend's wish to paint a song. She says: "The basis of this project is to capture that place between a rock and a soft place and to knit stone."
To knit stone! Of course! Because that is how magic happens! :)


And she also says this on her webpage: " For me, colour and texture rule and most of the inspiration feeding my imagination comes from the natural world. I see knitting as art, as viable as any other, and no matter what the tool or preferred palette, in human hands, magic happens. "


Quite amazing!
You can find more pictures of Jane's work on her webpage > Jane Thornley
Ravelers can also visit her group > Jane Thornley Ravelry group


We'll stay in Australia for another few moments because there are two more artists from the southern continent who's work I would like to show you!

One of them is Prudence Mapstone, an extremely imaginative Australian artist and a great promoter of free form crochet and knitting.
Prudence is a very productive author and it is literally impossible for me to pick the most representative picture of her work. I picked two but I invite you to follow the links posted under the pictures and visit her galleries - you'll find some amazing pictures there.

"Barren to Bountiful: What a Difference the Rain Makes" : a freeform knit and crochet wall-hanging created for the gallery wall at the Lion Brand Yarn Studio in New York City

Some of her works contain a few hundred different yarns! The close-ups are eye-capturing:


Here's a link to another imaginative project; Light at the end of the Tunnel  , a knitted panel with some surface embroidery, mounted in recycled window frame .


Finally, you DON'T WANT TO MISS her Freeform in the Landscape gallery. It is something that you don't see every day. Here's a teaser picture:


Prudence has a website with a lovely name Knot Just Knitting  where you can read more about her work, see how her artistic knitting/crocheting is implemented into wearable garments, subscribe to her newsletter, download her workbooks (check out the 'patterns' section) buy some of her projects and buy her books. She also writes a blog (PrudenceMapstone) and can be found as PrudenceM on Ravelry.
The list of books authored by Prudence Mapstone can be found HERE!

Let's move on! We're still in Australia!

Coral isle (1m x 1m mural)

When I first saw this mural I had to enlarge the picture just to make sure that it ws not painted. :) Impressive! It is made by Renate Kirkpatrick, another imaginative and enthusiastic Antipodean. She plays around with different yarns, stitches, hook sizes, texture, form, colour. Besides her practical contribution to the development of hand-crafts (from pottery and paper crafts to various fibre arts), she has also written three books about crochet: Crochet Techniques, Freeform Crochet and Beyond and Bring Colour to Crochet, all three sold worldwide.
Another thing worth mentioning is that Renate has won a few international prizes one of which I absolutely have to mention - she is the winner of the World's Best Tea Cosy contest in 2006. Here's the winning cosy:


Renate's blog is HERE. She is also rensfibreart on Ravelry.

Now, across the World and back to the Old Continent!

The Netherlands!

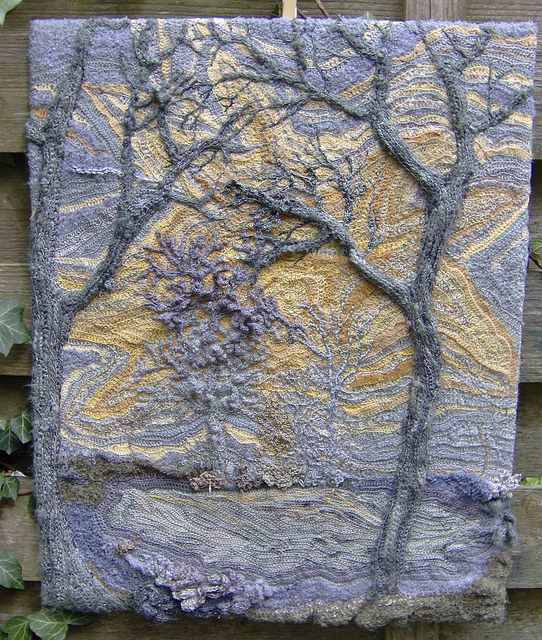
"Sun Fighting Mist" by Adri de Vries Tadema


From the author's notes: "They yellow sun is trying to fight its way through the mist, on an early morning...
the world is awakening and the skies are painted yellow and grey,
the world and all that is in it is still greyish."

The techniques used are: crochet, embroidery, spinning and painting silk and rayon threads.

Two more wall hangings, both made by Adri.
Adri writes two blogs simultaneously, one in Dutch and the other one in English, you can read them HERE (the Dutch version) and HERE (the version in English). She is a3devries on Ravelry.

Spain!

Big bang
Khaki tree


The author of these two projects is Amal  (artknitbyamal on Ravelry) who says that she "has had a passionate affair with wool, needle and hook for over 30 years". She drains her inspiration from nature: mountains, sunsets, forests and shadows.

I really like this Khaki tree wall-hanging. Khaki trees can be found in many gardens in my hometown and I'm insanely in love with their leaf-less, dark branches full of orange fruit in autumn.

Having mentioned my hometown, we're moving even closer to my part of the Earth- we're going to Austria!

Silver alleys

This wall hanging was made by Snježana Rock, a Croatian born Austrian designer living in Vienna. Snježana was kind enough to upload a gallery of photos taken during the process of making her wall hanging. That is just the  kind of thing I was hoping to find for this post. The gallery is HERE!
The rest of her projects can be found on her bilingual blog (in German and English) > Handstrick Flair .
During our brief correspondence, Snježana told me that she had learnt the technique, used for creation of her picture, by a German knitter and, apparently, a real authority - Gabriele Kluge. And, indeed, her work as well as works of some of her students and colleagues are quite amazing.

Gabriele Kluge has a web site in German - HERE.


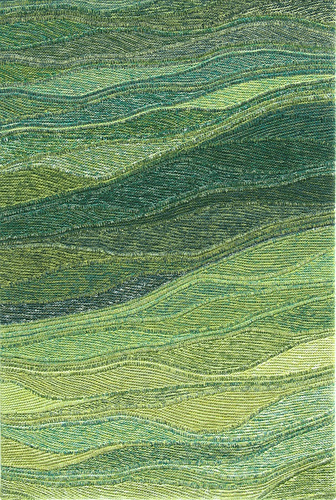
"Green Space" - Michaela Renz
"Peters Farben" - Gabriele Kluge


Spiralen - Margitta Biallas
"Herbstallee" - Marion Siepermann

One of the representatives of this knitting style is also Heidrun Liegmann-Halama, who's "Tulip" (or, originally, "Leben") you can see at the very begining of this post. She has a very interesting group on Ravelry called - Swing knitting.

Michaela Renz is the author of Candela lamp shades mentioned in my previous blog entry (Defiknitaly knitable).


I started this story with a Canadian knitter, Jane Thornley, who's  fascination with the Aboriginal culture "took me" to Australia. From Australia, we went to Europe and I think that it would only be fair to close the circle and go back to the New Continent.

I'm finishing this journey in Alabama, USA!

Freeform Crochet Sculpture by Cornflowerblue

Textile Art Heart by Cornflower Blue

Cornflower Blue is a happy and crafty young art historian called Rachel in love with freeform crochet. Some of her sculptures are offered for sale on her Etsy shop. She also 'runs' a very nice blog called Cornflower Blue Designs.  Do visit it some time, you'll enjoy her warm, lovely, colourful photos.

That's it! I hope you have enjoyed reading  this post as much as I have putting it together.

'till next time, cheers!

Related Posts Plugin for WordPress, Blogger...